Building the menu and adding decorations
NLP Web App might be a good title for our application, but to be honest, it’s just some black text on a white background, so it’s not very appealing at the moment.
One of the greatest features of Streamlit is that we can use HTML very easily. So, let’s add some simple HTML code to our main function just to make everything much more stylish! We can change the old st.title(“NLP Web App”) first line of code that sits after the main function declaration with the following one:
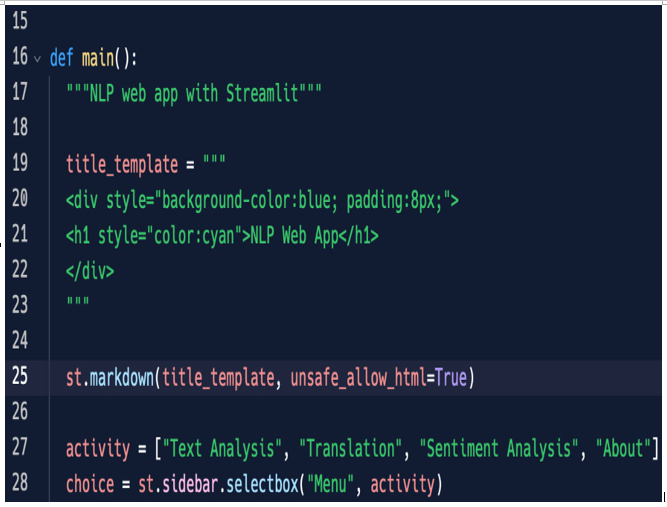
Figure 4.16: Adding some HTML to our title
In title_template, we are specifying the background color (blue), the padding size, and the text style (h1) and its color (cyan). With the st.markdown instruction, as we learned previously, we are just visualizing the HTML; you can play around and customize it as you want by changing the background and text color, padding, text, and more. This is the result:
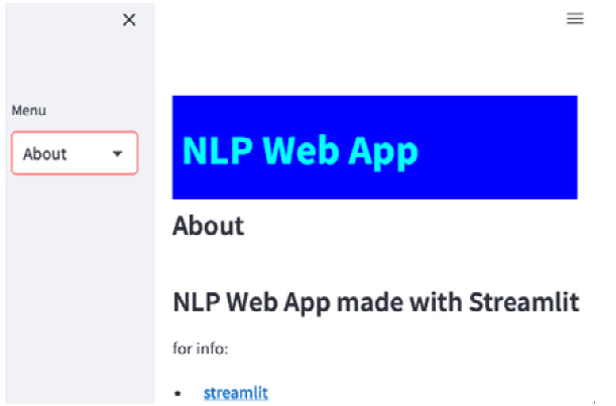
Figure 4.17: A colored title for our app
The effect is very nice.
Now, let’s create a subtitle. To do this, we can use a subheader and use more or less the same HTML code. We just need to add another couple of lines of code, as shown in the following figure:
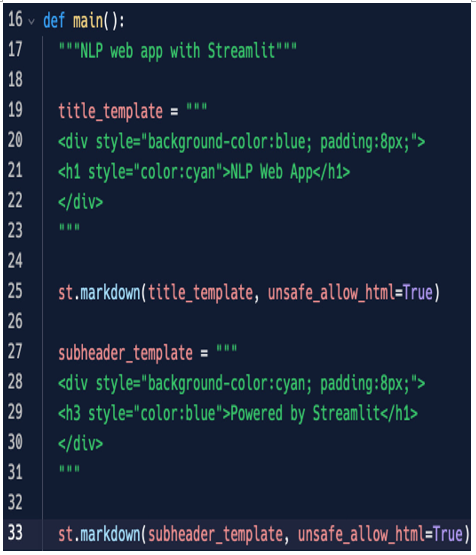
Figure 4.18: The final code for the title and subheader
We approached this the same way we approached title_template in Figure 4.16: we defined some HTML in a variable (in this case, subheader_template) and then visualized it using st.markdown and by setting the unsafe_allow_html argument to True.
As mentioned previously, everything is fully customizable according to your ideas. This is the final result:
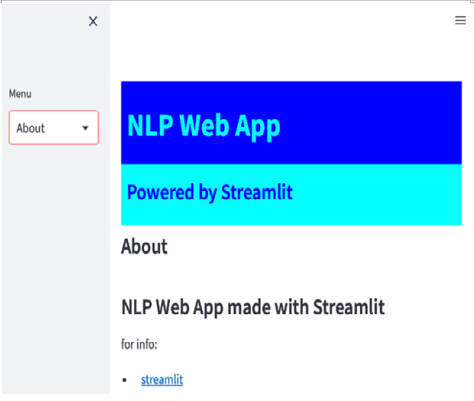
Figure 4.19: The final colored title and subheader
Since we put these decorations at the very beginning of the main function – that is, before creating the left-hand side menu and the if clauses that are in charge of selecting various tasks – the colored HTML title and header will not change when we switch the various menu items since they are fixed on the top of the screen and give our web application a very good style consistency. In short, since we put this HTML code at the beginning of the main function, it will be applied to the entire web application and not to any specific task – everything will be affected by this title. The title will be a fixed element of our web application.
If we look at our web application’s panel in the browser, we will see that the icon and the title are the default ones since the icon is Streamlit’s, and the title is just the name of our Python file (app.py):
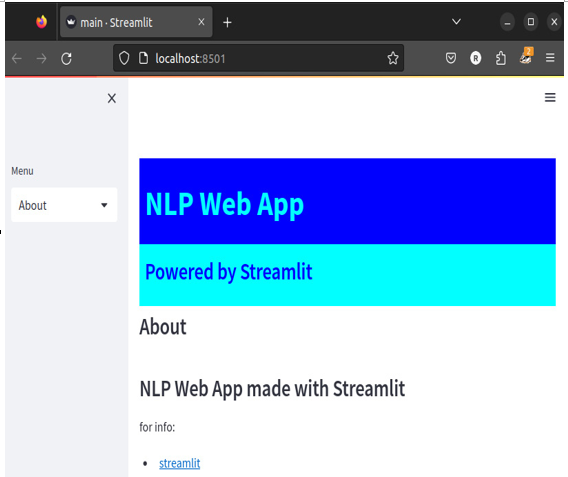
Figure 4.20: The web app’s default icon and title in the browser
Let’s customize these two very important features. In Streamlit, there is an instruction dedicated exactly to this purpose, but – and this is very important – it has to be placed immediately after the streamlit import line. This instruction is set_page_config. Let’s add it to our app.py file and then explain how it works:

Figure 4.21: The set_page_config instruction
